Please return to this page for an overview of ADIF logging and description of tool features.
Download
This spreadsheet requires Microsoft Excel, available in the Microsoft Office 365 suite or as a stand-alone product under older releases. Since this spreadsheet uses macros, it will not run effectively in compatible office suites such as LibreOffice.
You can download it from the link below (in compressed .zip format), then extract it to a .xlsm (macro-enabled spreadsheet) file:
Installation
Download the file from the link above (right-click and “Save”). Due to server security limitations, this file is provided in .zip format for later extraction to a macro-enabled Excel file.
Navigate to the .zip folder via Windows File Manager and extract the Excel spreadsheet from this file.
Configuring
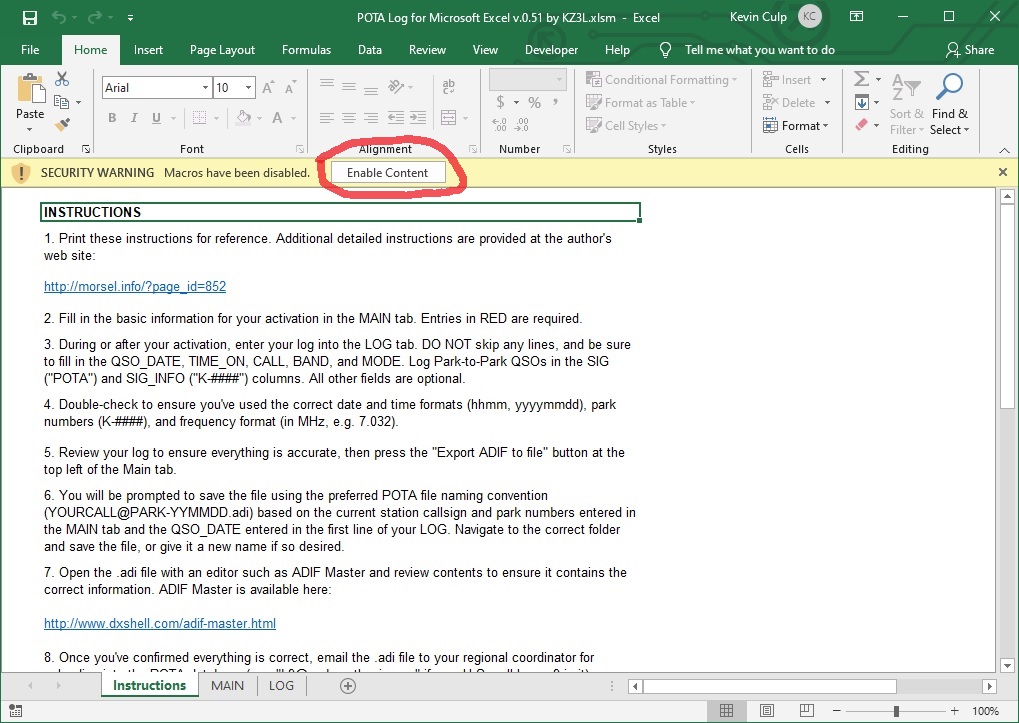
Open Microsoft Excel on your PC and navigate to the log file you just extracted. Open it. When prompted, please enable macros by selecting “ENABLE CONTENT” in the yellow security warning banner (macros are required to properly export the ADIF file) and read the instructions in the first tab.
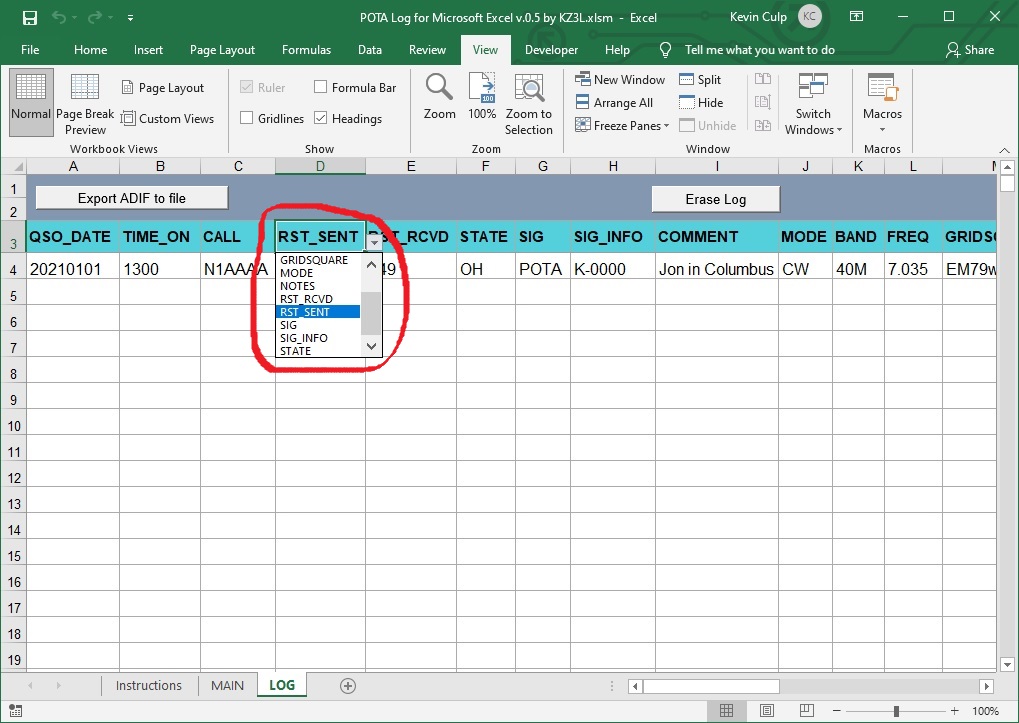
Visit the LOG tab and review the order of the headings. You can reorder them to match your operating style. The first three columns must remain where they are, but the others can be reordered simply by selecting the column heading and changing the field name to the one you want from the drop-down list. Best practice: Push fields that don’t require frequent updating to the right.Be careful NOT TO DUPLICATE any field names! You may also change column widths to match your needs.
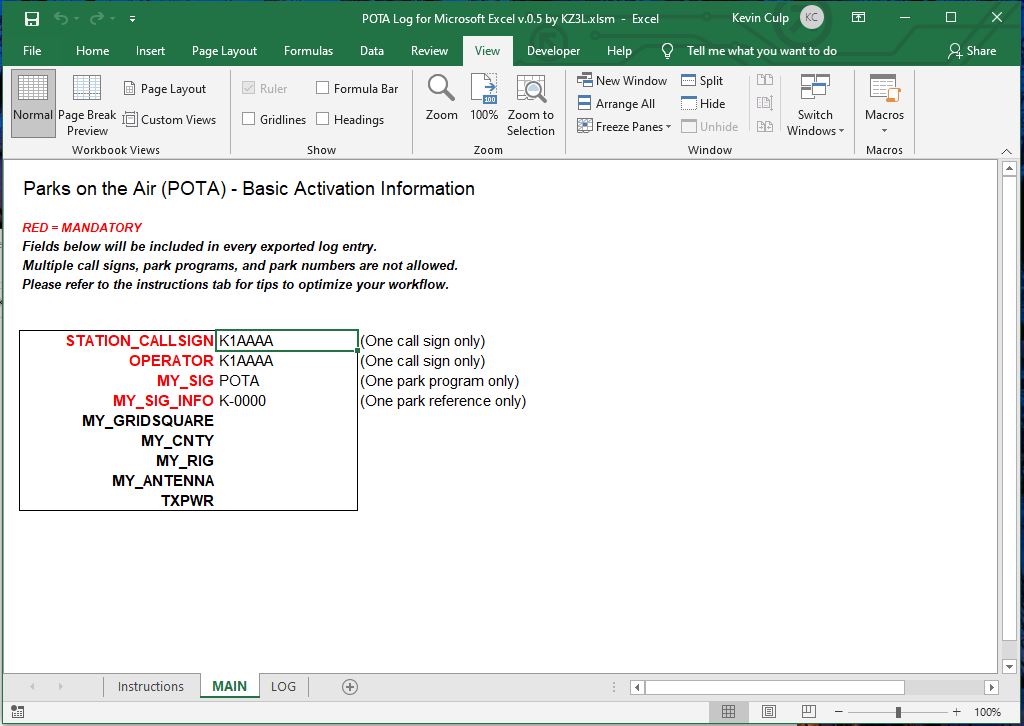
Next, visit the MAIN tab and change the STATION_CALLSIGN, OPERATOR, and any other activation-wide settings you wish to configure in advance. For instance, if you always use a Yaesu FT-891 as your POTA rig, enter it here. (You can always change these later if needed.)
Now save this spreadsheet and use this file as a template for future logs by making a duplicate whenever you are ready to begin a new activation.
Entering Your Log
Duplicate and Name the Spreadsheet
Before starting to log a new activation, make a copy of the template you saved in the step above and give it a name relevant to your park activation (e.g. MYCALL@K-0000-20210101). Use this newly-created file to log your contacts for the current activation.
Enter Activation-Wide Data
Fields that apply to the entire activation are entered in the MAIN tab. These will appear in every entry of your log when it is exported to an ADIF file. Be sure to populate all “red” (mandatory) fields.
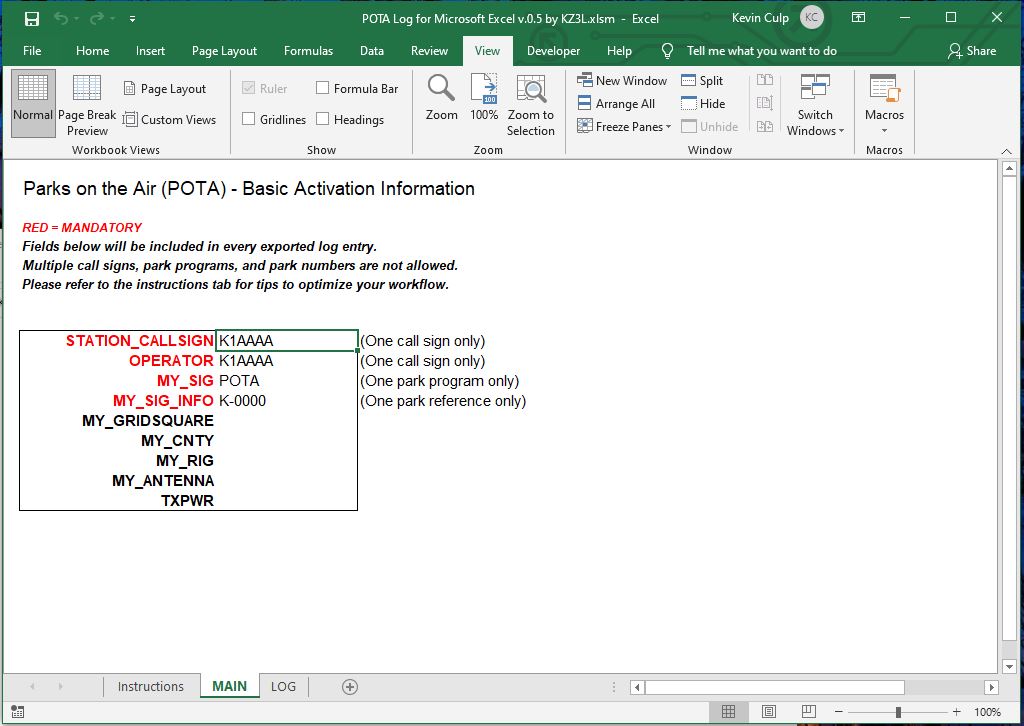
Note that ONLY ONE call sign, park program, park reference number, etc. may be entered in each field. (If you are doing a multi-park or multi-operator activation, when you are finished, you can export the log to ADIF, change these fields, and export a new ADIF file under a different name.)
Log Your Contacts
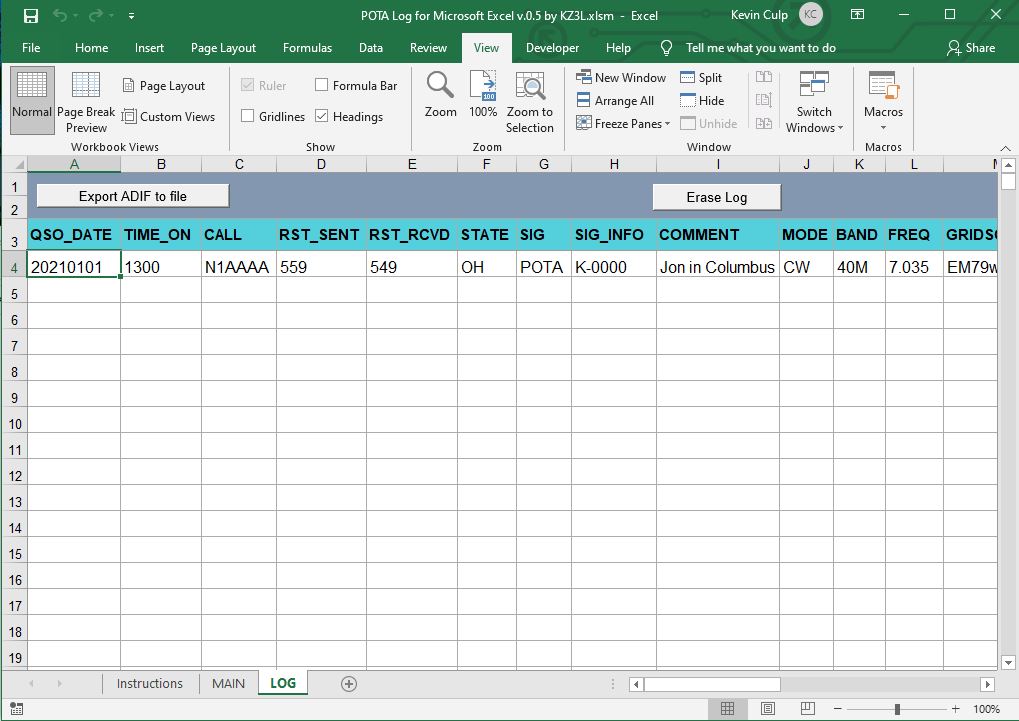
Go to the LOG tab and begin entering your contacts. You do NOT need to fill in every cell during the activation–I like to insert the time every 15 minutes or so and fill the remainder in later. Likewise, I only enter the BAND, MODE, and FREQ when I change parameters, and fill in the blanks later.
You can use the standard Excel “copy & paste” features to quickly enter data into empty cells–one-at-a-time or as a group–by copying them and pasting them into other cells. The usual “select original cells / right-click copy / select target cells / right-click paste” sequence is the conventional way to do this.
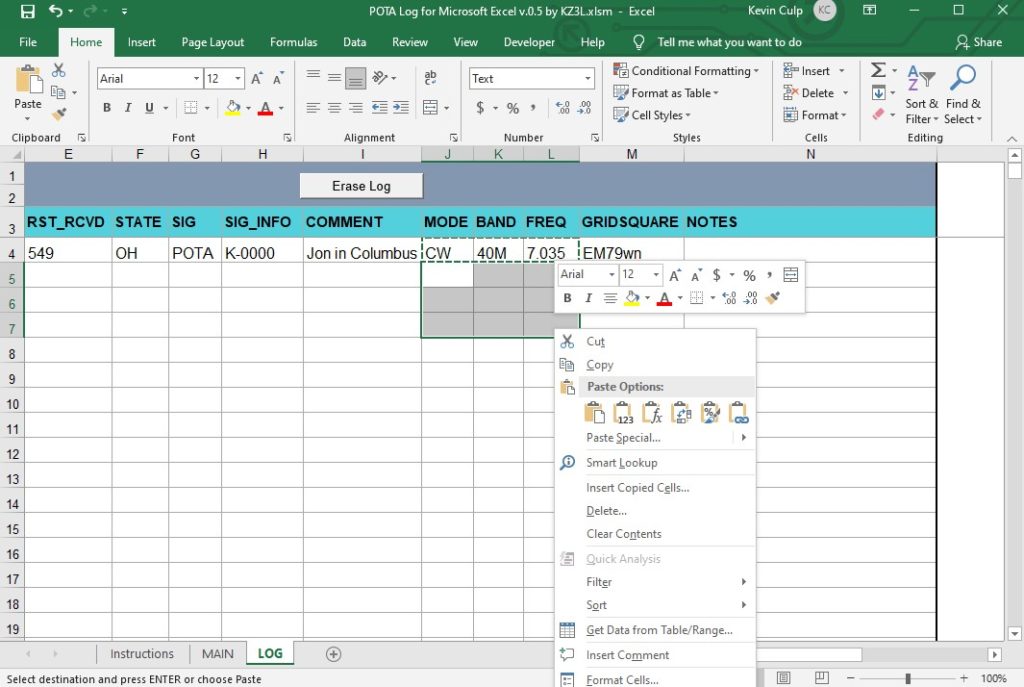
If you need to clear a cell or multiple cells, select only those cells and choose “Delete”.
I do not recommend deleting or inserting entire rows or columns (usually done in Excel by selecting the row number or the column letter) since that will inadvertently impact the formatting and embedded calculations. Limit yourself to “Cut,” “Copy,” “Paste,” and “Delete” only to selected cells.
Saving Logs
Be sure to save your log periodically. It is also often a good idea to make a back-up file just in case something happens to your file system.
Before finalizing your log, please ensure ALL POTA-REQUIRED fields are filled in and entered correctly for every log entry. This spreadsheet does not do any error-checking, so it is up to you to verify everything. POTA requires these fields: STATION_CALLSIGN, OPERATOR, MY_SIG, MY_SIG_INFO, QSO_DATE, TIME_ON, CALL, BAND, and MODE. If you contact another park, fill in the SIG and SIG_INFO columns with “POTA” and the park number, respectively.
If you are using the log live during an activation and have access to a WiFi hotspot, I recommend emailing a copy of the spreadsheet to yourself after saving it.
Exporting Logs
The previous step retains the log in Excel format on your PC. However, to submit your log to POTA, or to import it into another logging application outside of the iPad, it must be exported into an ADIF-compliant file.
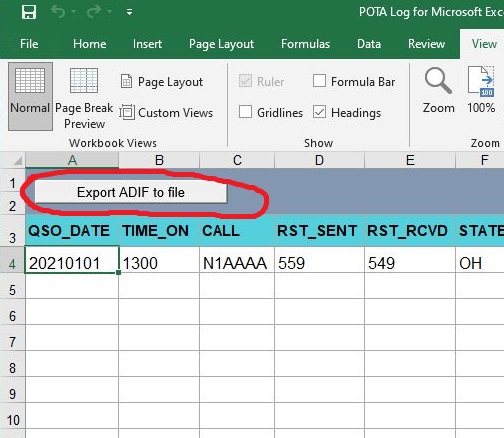
Provided you correctly enabled macros as discussed in the Installation section above, an ADIF-compatible file will be generated and saved automatically simply by clicking the “Export to ADIF File” button above the header row on the LOG tab.
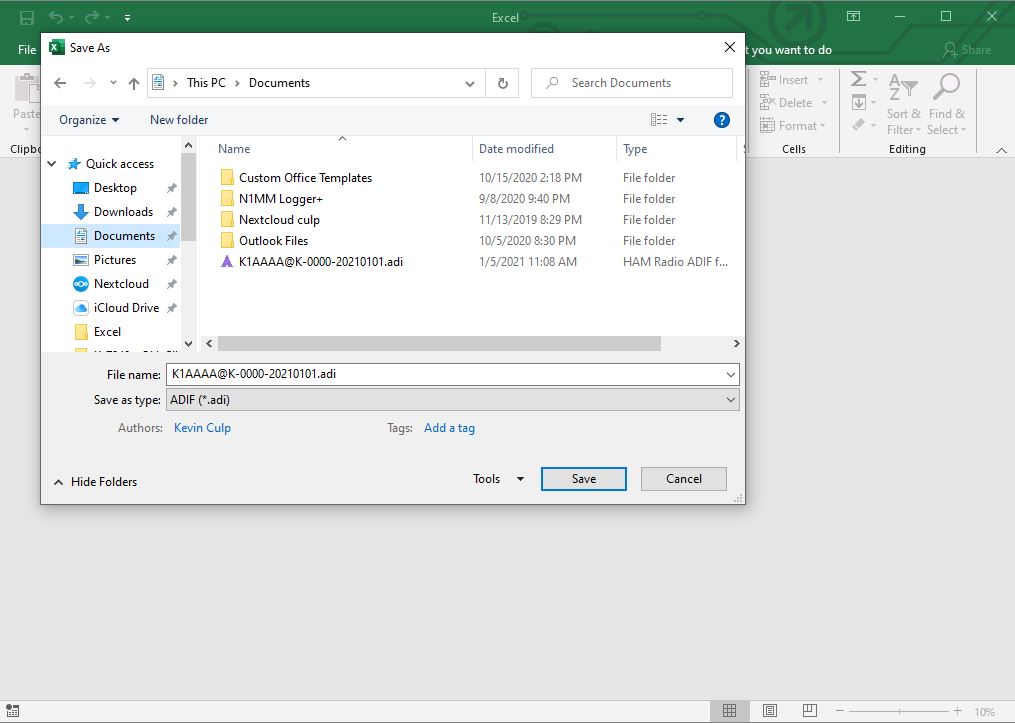
A default name, based on the STATION_CALLSIGN and MY_SIG_INFO (your park number) entered in the MAIN tab and the QSO_DATE used in the first entry of your log, will be assigned. You can change this if you wish.
Checking Your ADIF File
Until you are confident your logs are being formatted correctly, and especially while this tool is still in beta release, I recommend saving the ADIF file to a Windows PC and examining it before sending it to your regional coordinator.
Download and install the free “ADIF Master” utility on a PC, open your .adi file with it, and inspect the file to ensure all fields appear as they should.
The ADIF Master utility is fairly robust and could theoretically be used to enter your log directly into an ADIF-compatible file, but it lacks some of the refinements (and intuitive interface) to which many spreadsheet users have become accustomed. Additionally, it is only available on the Microsoft Windows platform.
Retaining Old Logs and Starting a New One
I recommend keeping all of your original Excel spreadsheets instead of overwriting them, along with your ADIF files for every activation.
You can import the ADIF files into your favorite logging application for long-term reference if you wish, and for exporting into other logging systems such as the ARRL Logbook of the World, QRZ.com, or eQSL.
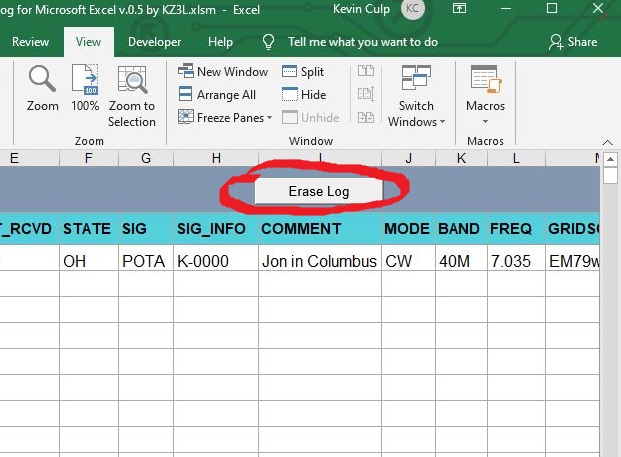
To start a new activation, always make a fresh copy of the original template you created in the “Configuration” section so you don’t inadvertently change an historical log. Alternatively, if you prefer to continue using the same file, an “Erase log” button is provided. Use this with caution as it will clear the LOG tab of your spreadsheet.
Closing Comments
If you have any questions or comments, please feel free to contact me via the Contact page on this site. I welcome feedback on this spreadsheet.
