
Please return to this page for an overview of ADIF logging and description of tool features.
Download
If you don’t have it already, please install the Apple Numbers application, available for free from the iOS App Store. You will also need to install the QuickText Plain Text Editor app (free for editing up to five files per week, US $4.99 charge for unlimited usage) from the App Store in order to properly export ADIF files to iOS file storage or via email.
Now you may download the logging spreadsheet onto your iPad. If you need help doing this, please see the next section.
Installation
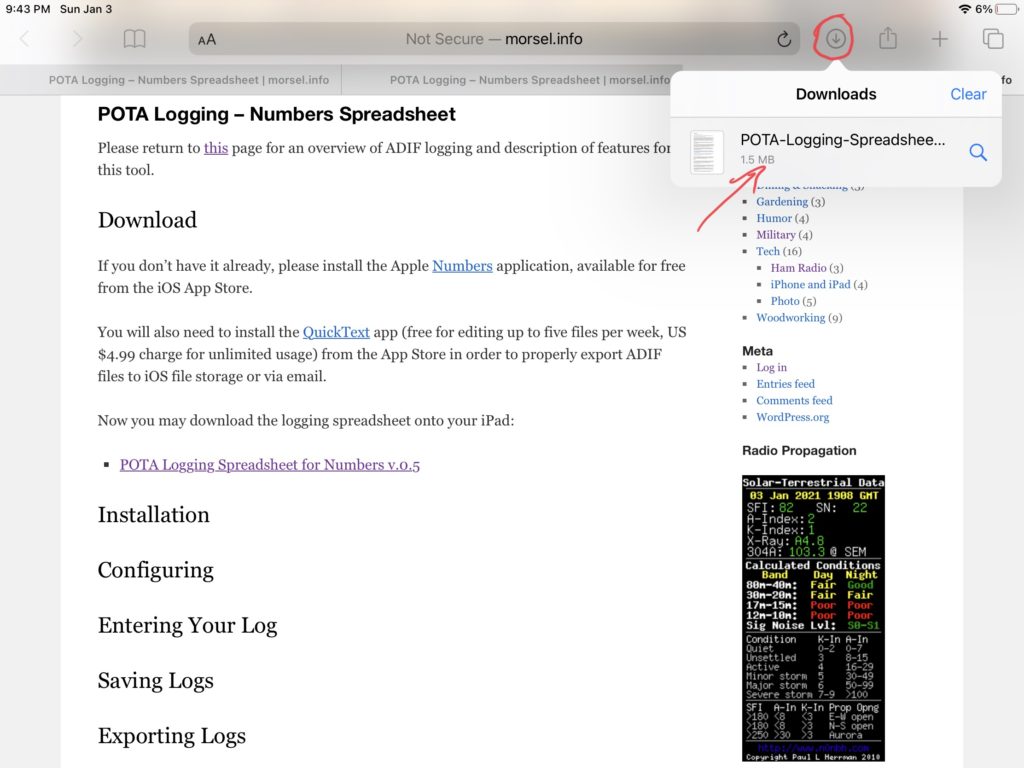
To place the logging spreadsheet on your iPad, from the iPad itself, tap the link above. You will be prompted to either “View” or to “Download” the file. Choose “Download.”

Tap the Download button on the top right corner of the screen, select the name of the file, and store the file in a recognizable folder (Numbers, Logs, etc.) on your iPad.

Configuring
Open Numbers on your iPad and navigate to the log file you just saved. Open it and read the instructions.
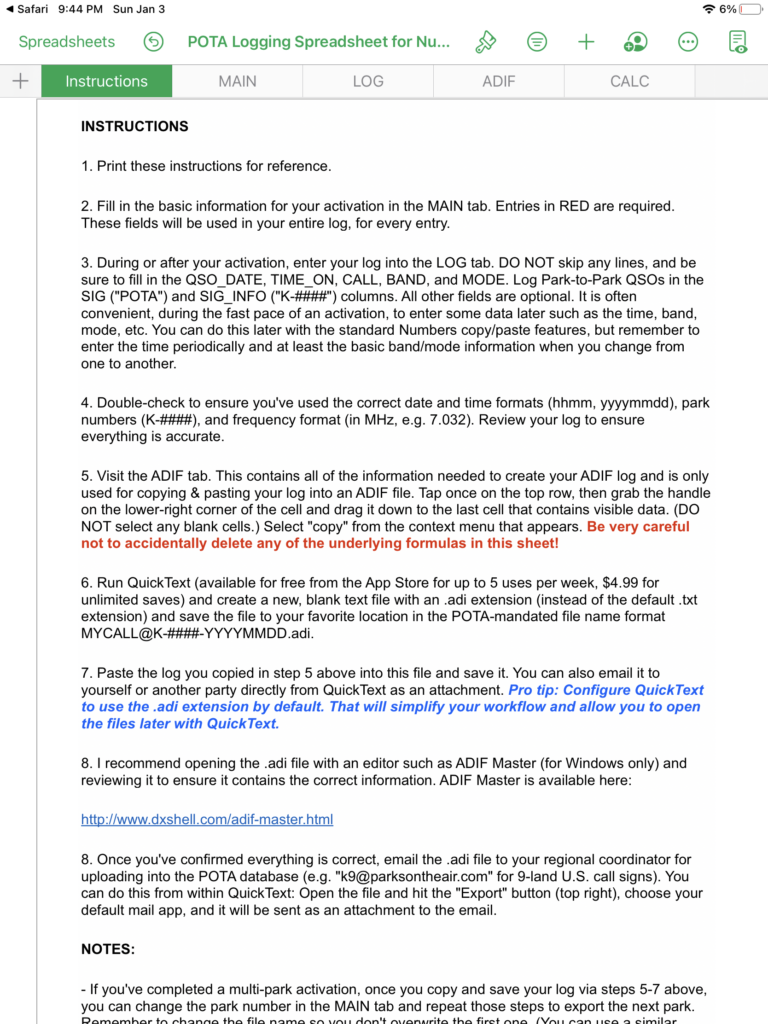
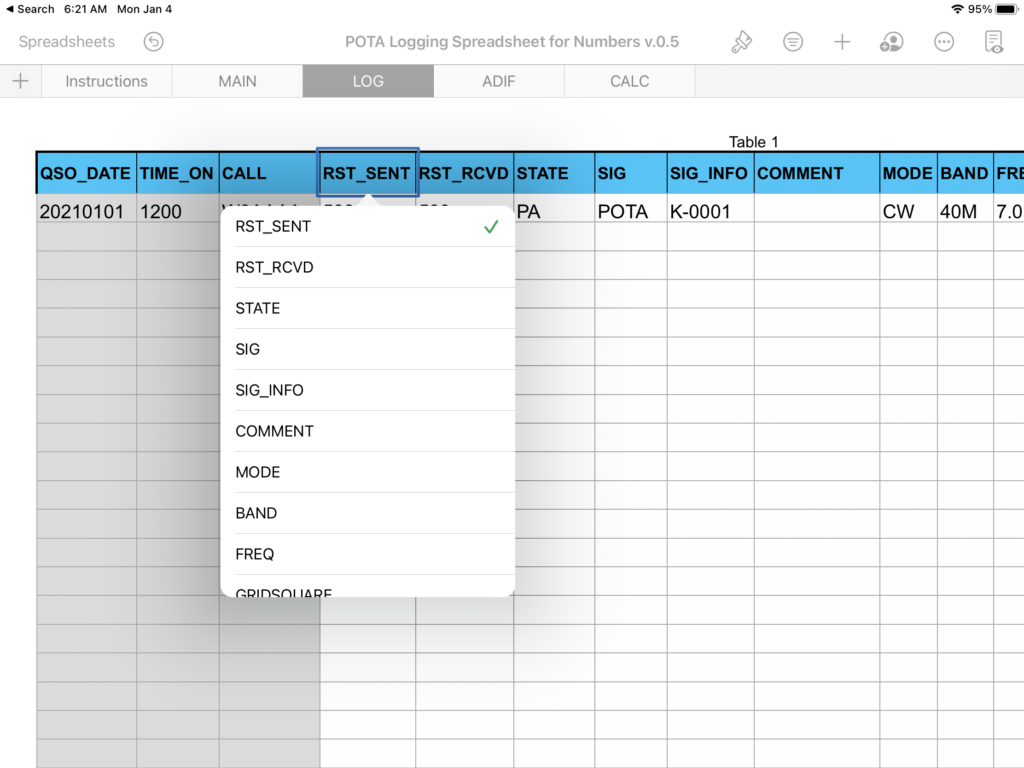
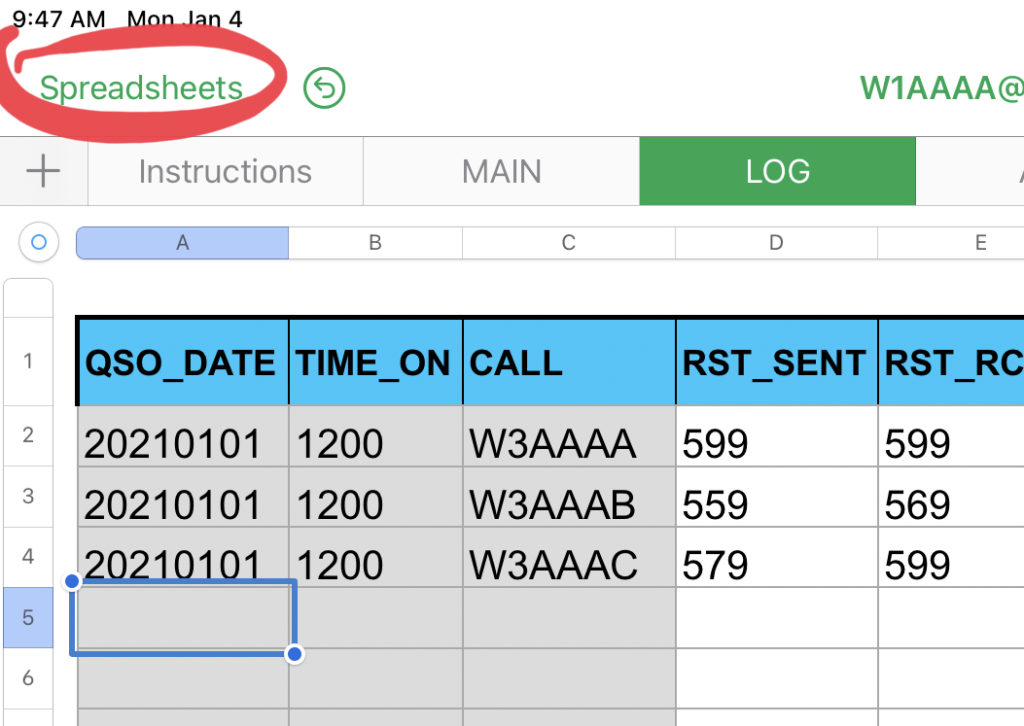
Visit the LOG tab and review the order of the headings. You can reorder them to match your operating style. The first three columns must remain where they are, but the others can be reordered simply by tapping on the column heading and selecting the field name to the one you want from the drop-down list. (Be careful NOT TO DUPLICATE any field names!) You may also change column widths to match your needs. (Best practice: Push fields that don’t require frequent updating to the right.)
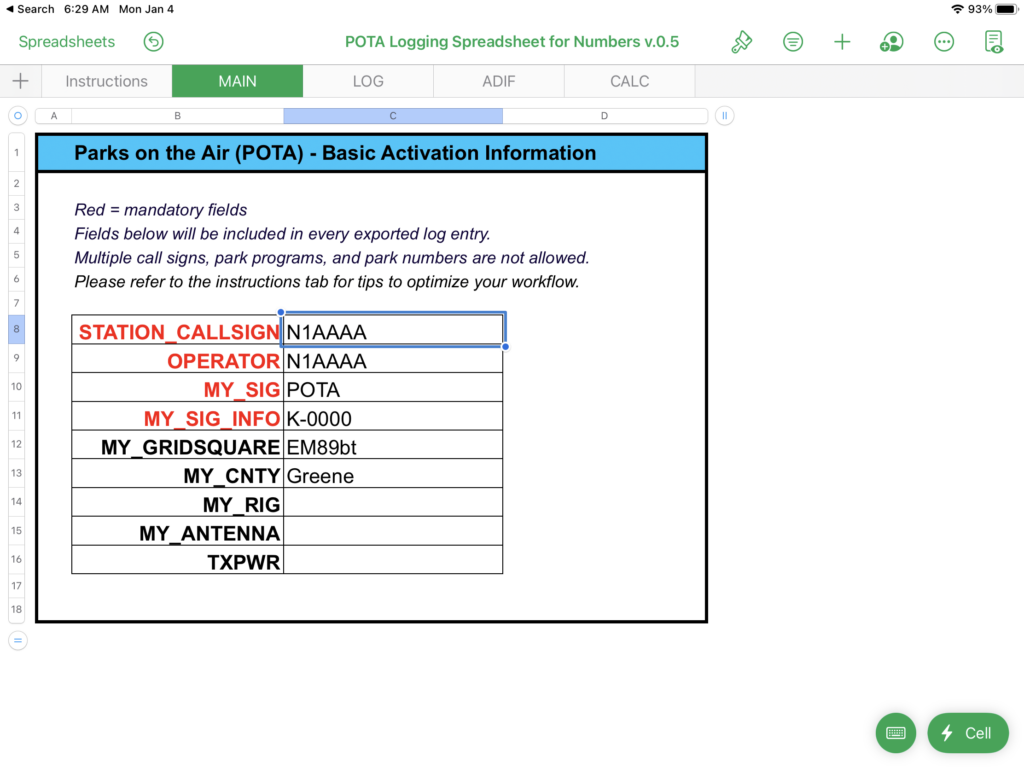
Next, visit the MAIN tab and change the STATION_CALLSIGN, OPERATOR, and any other activation-wide settings you wish to configure in advance. For instance, if you always use a Yaesu FT-891 as your POTA rig, enter it here. (You can always change these later if needed.)
Now save this spreadsheet and use this file as a template for future logs by making a duplicate whenever you are ready to begin a new activation.
Entering Your Log
Duplicate and Name the Spreadsheet
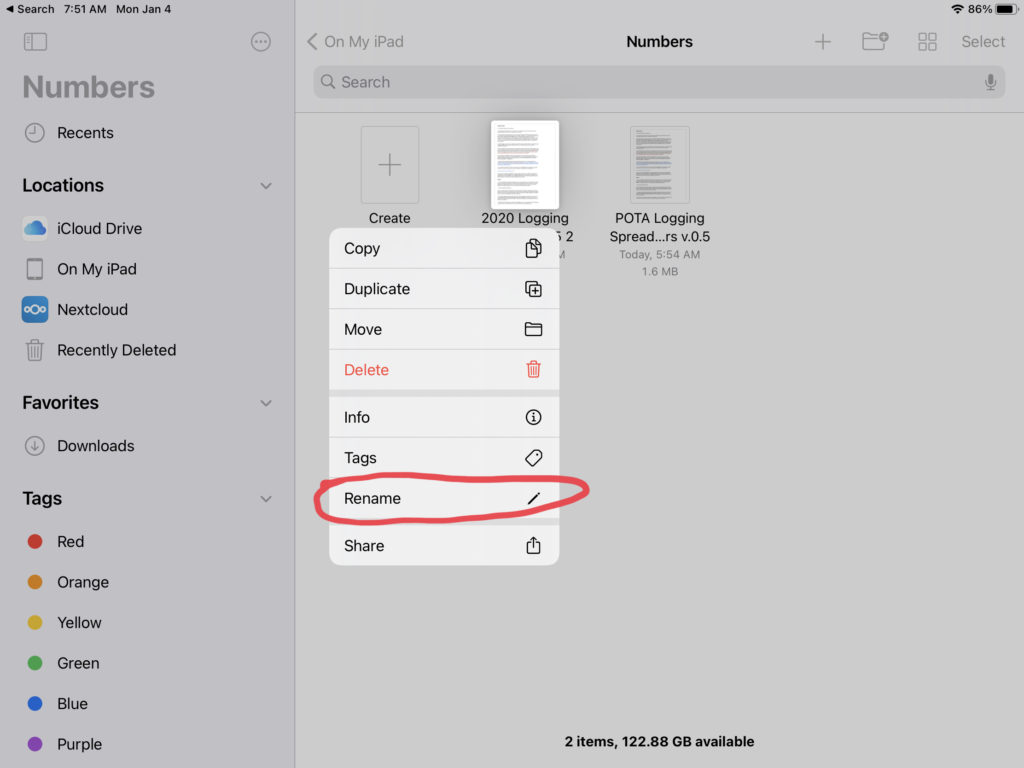
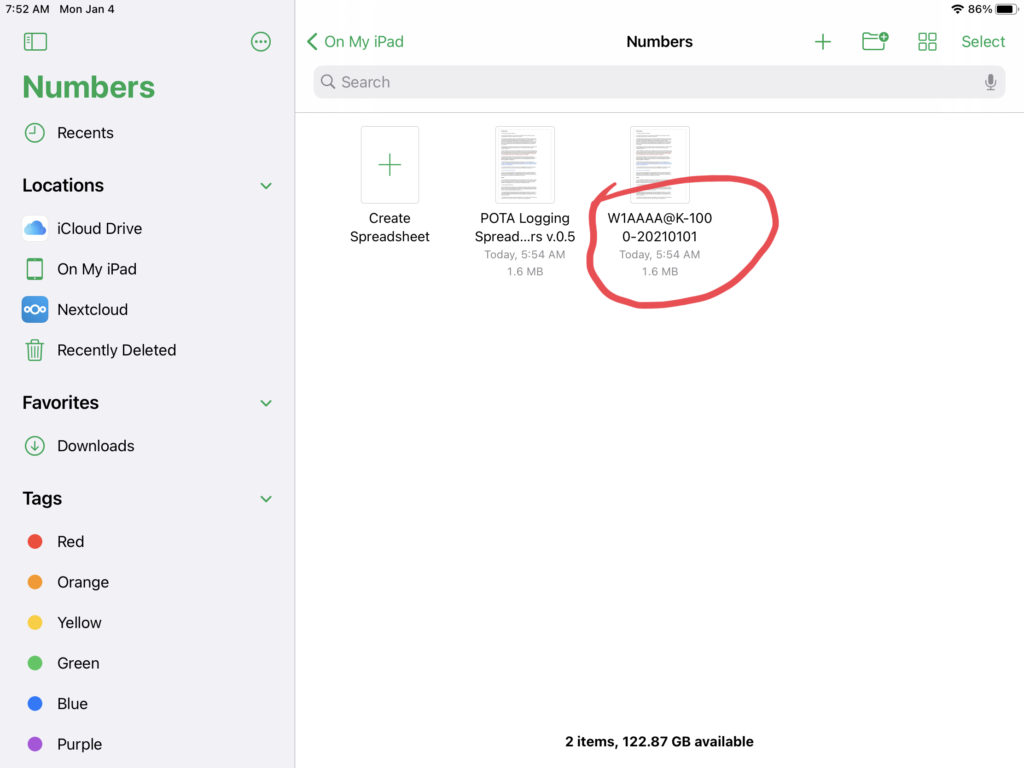
Before starting to log a new activation, make a copy of the template you saved in the step above and give it a name relevant to your park activation (e.g. MYCALL@K-0000-20210101). To do this, long-press the icon and choose “Duplicate.” Long-press the duplicated file and choose “Rename.” Use this newly-created Numbers file to log your contacts.
Enter Activation-Wide Data
Fields that apply to the entire activation are entered in the MAIN tab. These will appear in every entry of your log. Be sure to populate all “red” (mandatory) fields.
Note that ONLY ONE call sign, park program, park reference number, etc. may be entered in each field. (If you are doing a multi-park or multi-operator activation, when you are finished, you can export the log to ADIF, change these fields, and export a new ADIF file under a different name.)
Log Your Contacts
Go to the LOG tab and begin entering your contacts. You do NOT need to fill in every cell during the activation–I like to insert the time every 15 minutes or so and fill the remainder in later. Likewise, I only enter the BAND, MODE, and FREQ when I change parameters, and fill in the blanks later.
You can use the standard Numbers “copy & paste” features to quickly enter data into empty cells–one-at-a-time or as a group–by copying them and pasting them into the cells below.
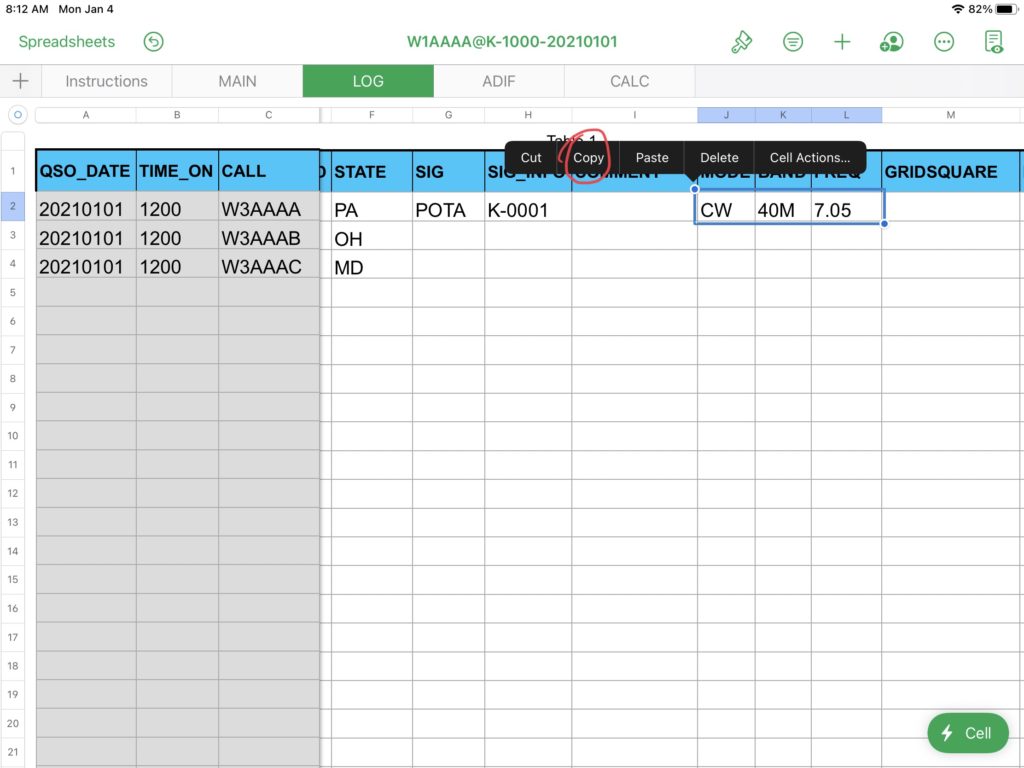
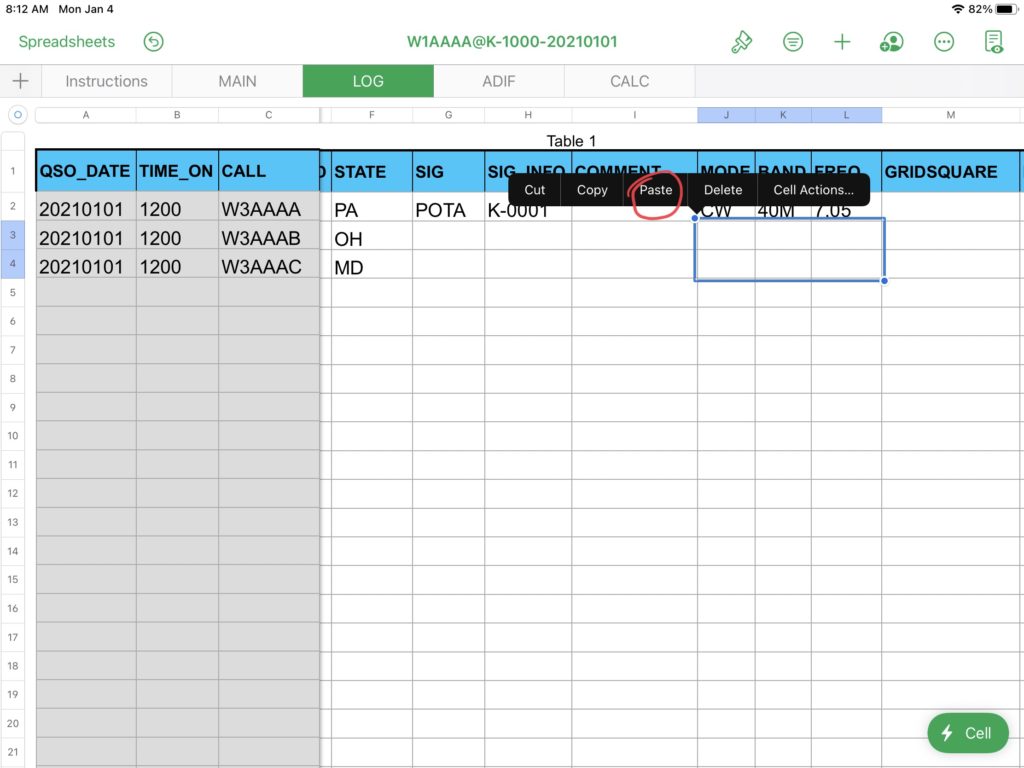
If you need to clear a cell or multiple cells, select only those cells and choose “Delete”.
I do not recommend using “Cut” since that causes unpredictable font formatting issues. Also do not delete or insert entire rows or columns (usually done in Numbers by selecting the row number or the column letter) since that will inadvertently impact the formatting and embedded calculations. Limit yourself to “Delete,” “Copy,” and “Paste.”
External Keyboard
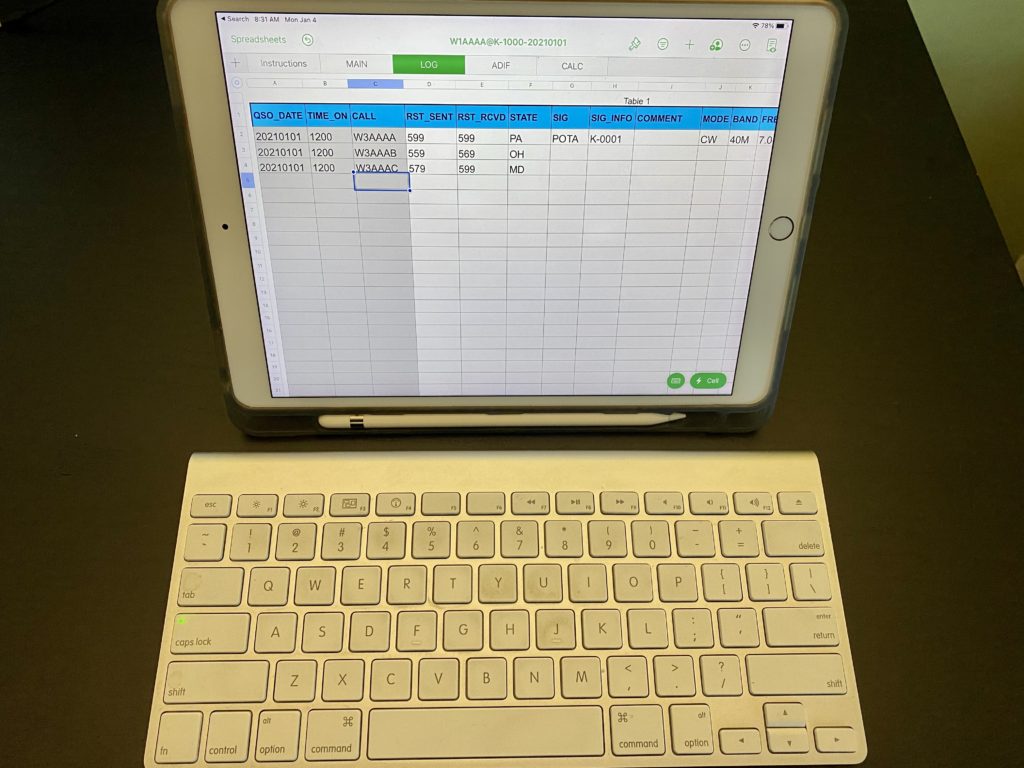
By far the simplest way to enter your log data is by using an external keyboard.
Leave the “Caps Lock” enabled, and simply tab between the cells and press the RETURN key when finished with a log entry. The left/right arrow keys and number keys are all easily accessible and don’t require any awkward clicking or pressing to enter your log. Typing call signs, in particular, is more convenient with an external keyboard since the number keys (with most keyboards) are readily accessible and independent of any other keys.
However, you should become comfortable using the on-screen keyboard as well in case your batteries die, your bluetooth connection fails, tree sap falls into your keyboard and causes your keys to stick, etc.
On-Screen Keyboard
The on-screen keyboard is certainly a convenient way to enter data, but switching between letters and numbers (particularly when you want to keep letters capitalized) can be a little bit clunky.
In Numbers, I recommend trying a couple of different approaches and settling on the one that suits you best.
Firstly, enable caps lock by double-tapping on the shift key:
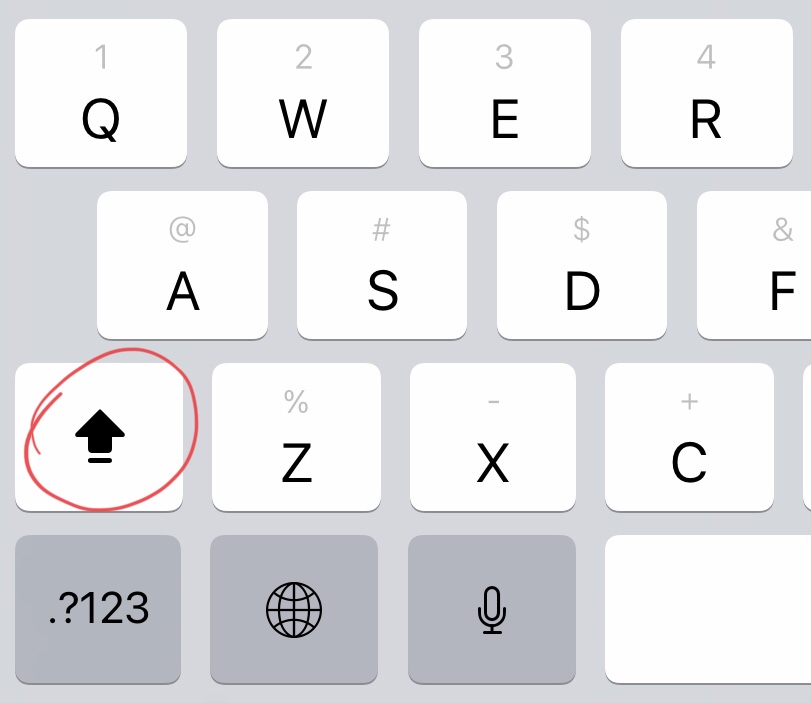
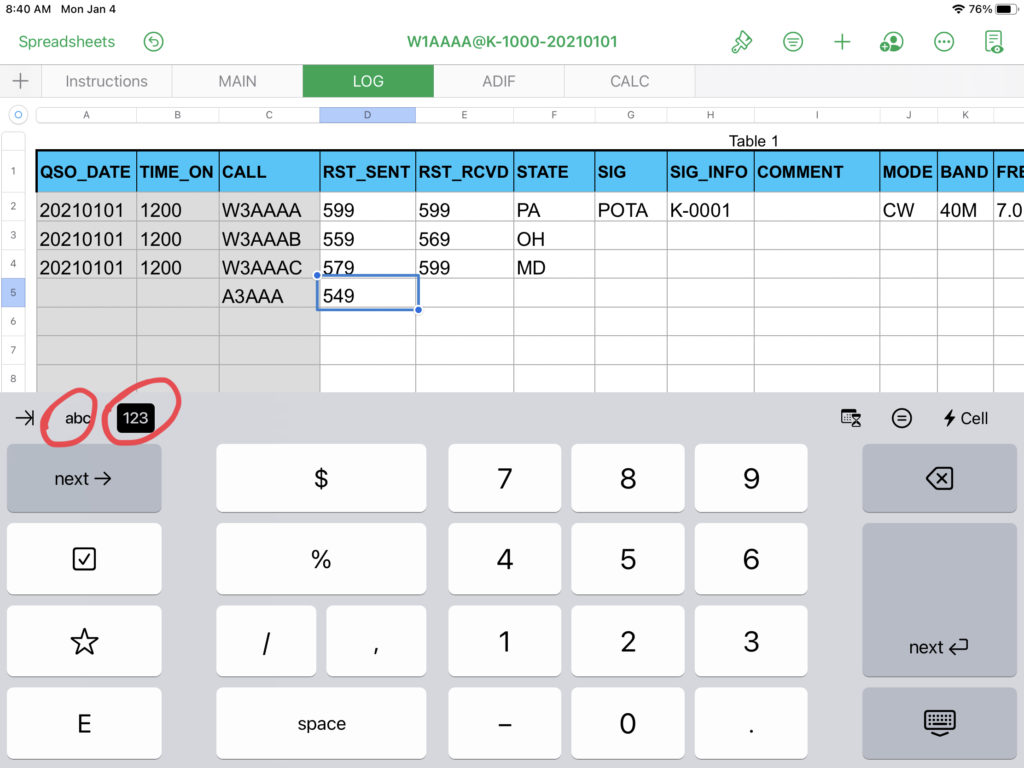
Secondly, when entering a string of numbers (e.g. RST or a park number), switch from the alphanumeric keyboard to the number pad:
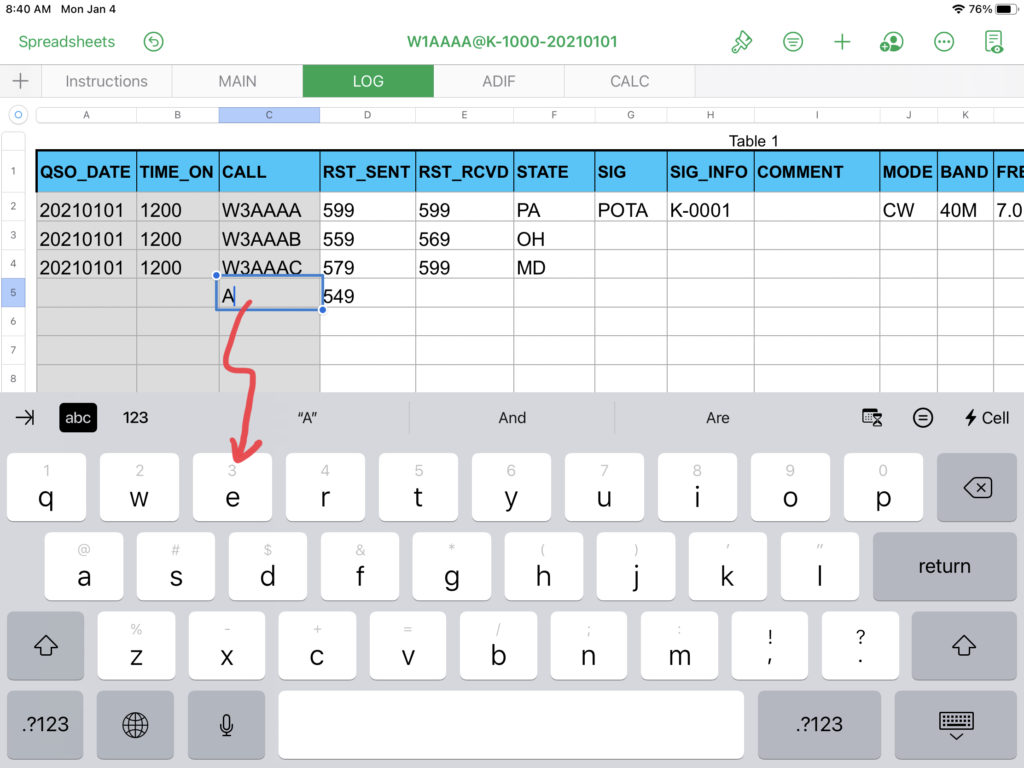
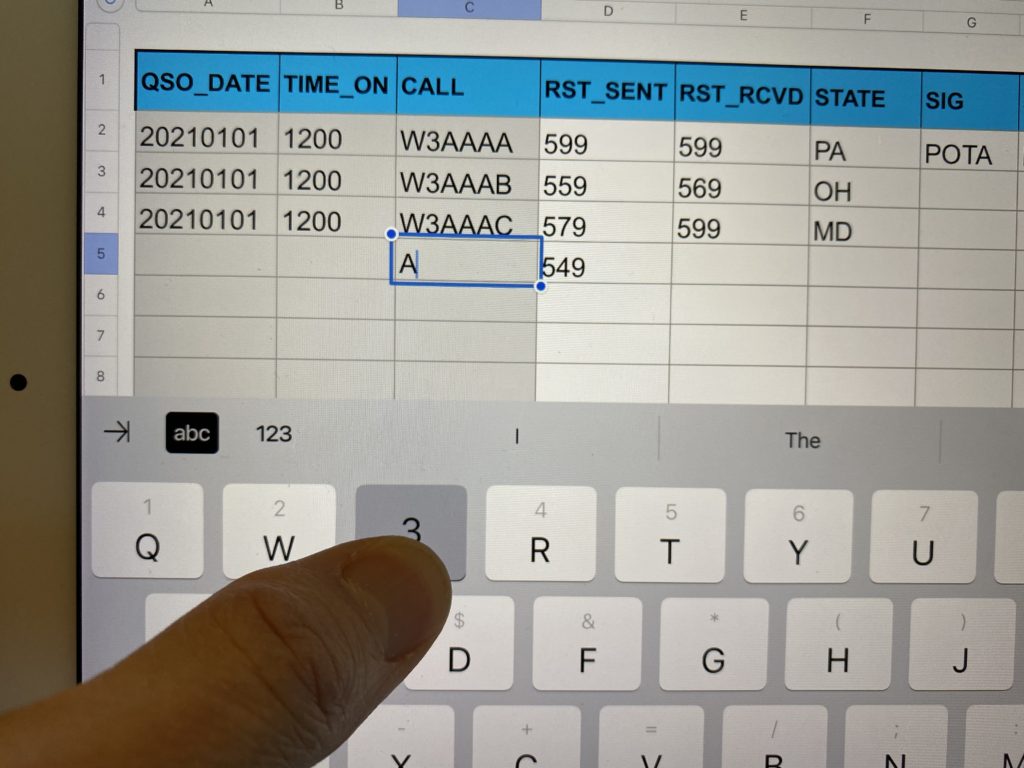
Thirdly, consider using the “swipe down” method to enter a number. Just drag your finger from the top of the letter/number key (for example, the “E” key doubles as the “3”) to the bottom of that same key. (It takes a little practice to do this consistently.) This method especially helpful when entering call signs, since it allows you to keep all letters capitalized and enter a single number when you need it.
Apple Pencil
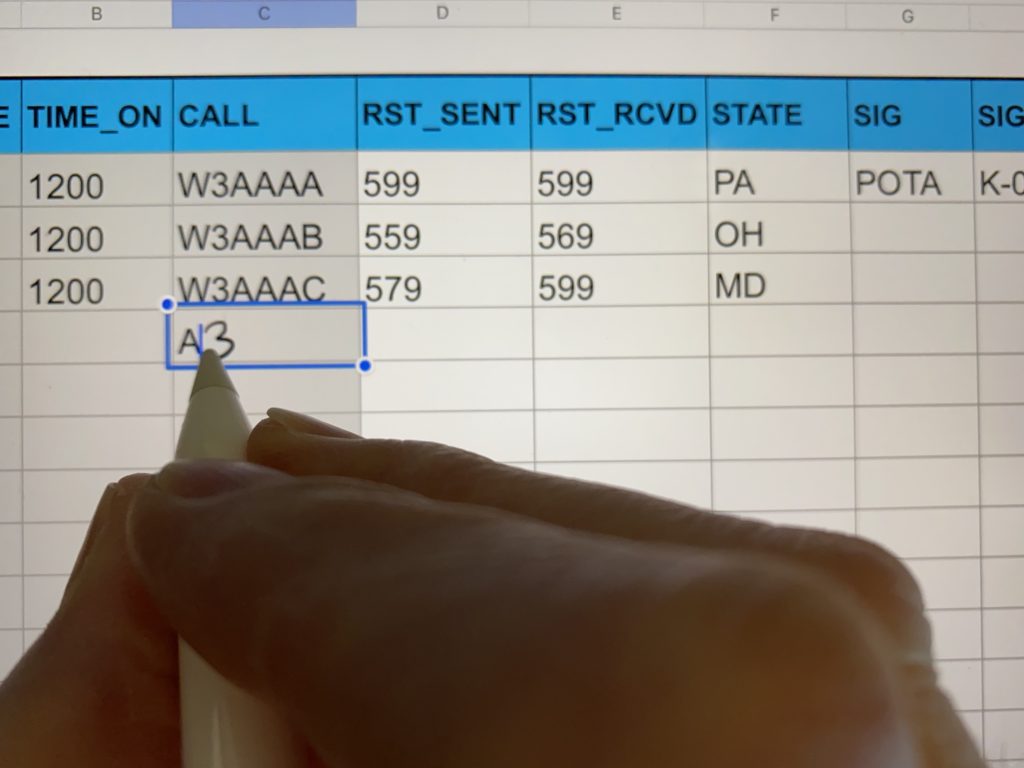
Introduced in iOS 14, the ability to use the Apple Pencil to enter text or numbers into any field can be helpful as well. Tap in the cell, then simply begin writing. You do NOT need to remain within the boundaries of the cell once you start writing into that cell. Wait a second before tapping into the next cell to enter your next data field.
Gestures can be used with the Apple Pencil to do additional things, such as deleting text or cells. Please refer to Apple’s official documentation for more information.
Saving Logs
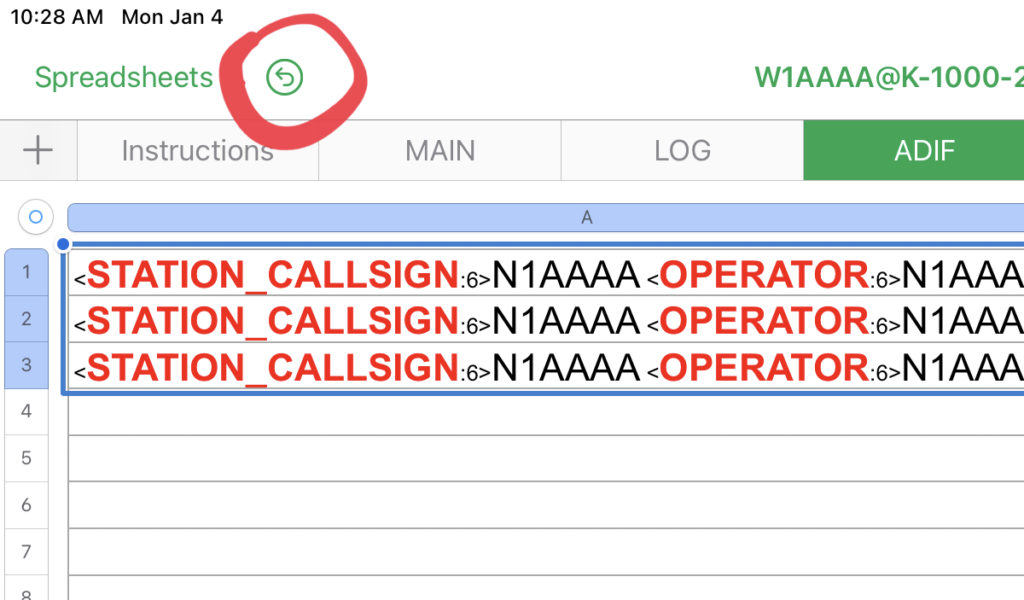
Your file will be saved automatically simply by tapping on the “Spreadsheets” link at the top left corner of your screen.
Before finalizing your log, please ensure ALL POTA-REQUIRED fields are filled in and entered correctly for every log entry. This spreadsheet does not do any error-checking, so it is up to you to verify everything. POTA requires these fields: STATION_CALLSIGN, OPERATOR, MY_SIG, MY_SIG_INFO, QSO_DATE, TIME_ON, CALL, BAND, and MODE. If you contact another park, fill in the SIG and SIG_INFO columns with “POTA” and the park number, respectively.
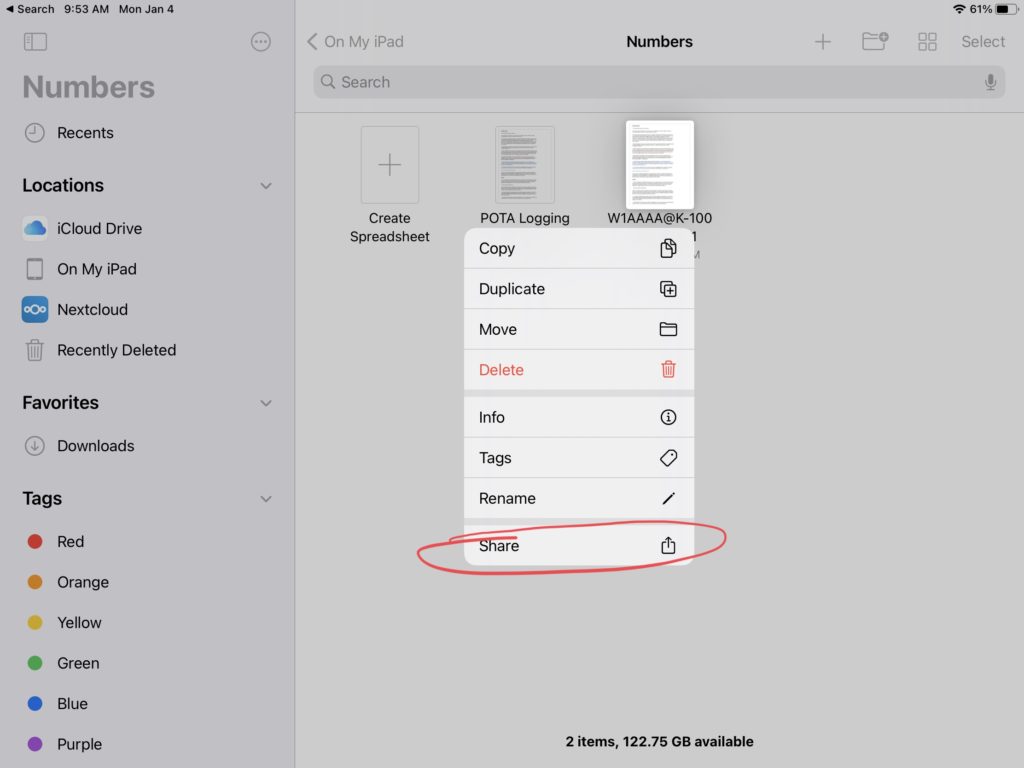
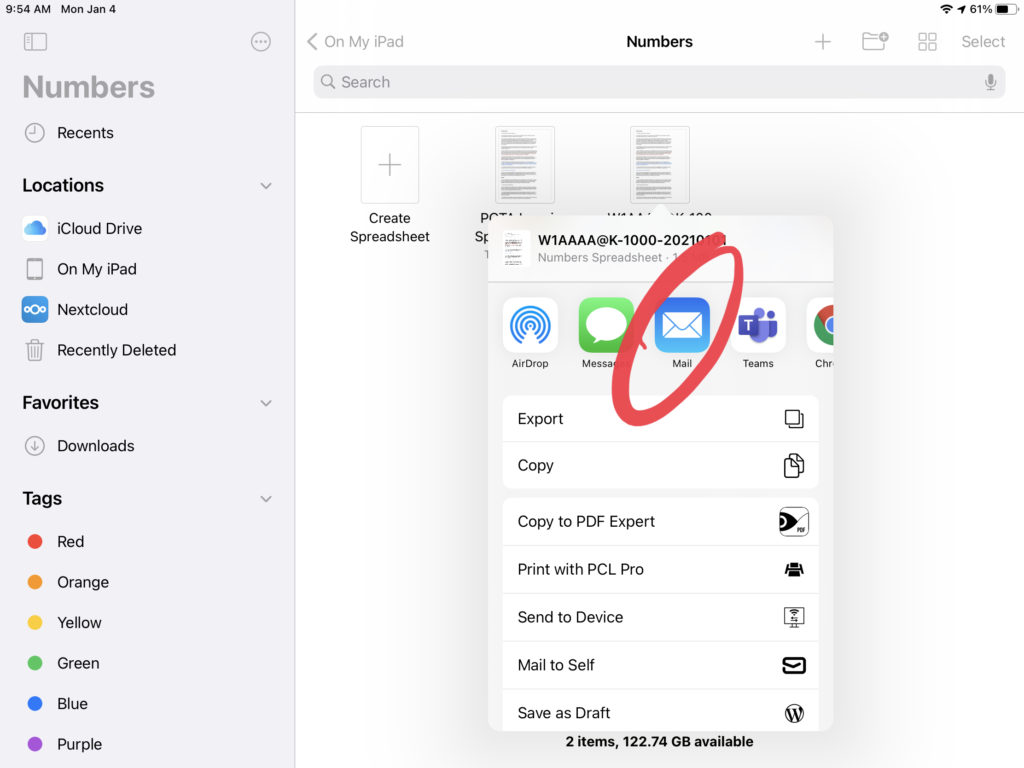
If you have access to a WiFi hotspot, I recommend emailing a copy of the spreadsheet to yourself after saving it. Long-press the file icon, select Share, and open it in the iPad’s default email client.
Exporting Logs
The previous step retains the log in Numbers format on your iPad. However, to submit your log to POTA, or to import it into another logging application outside of the iPad, it must be exported into an ADIF-compliant file.
Visit the ADIF tab and select the visible cells only by tapping on the first one, and dragging the lower-right corner down to the bottom cell entry. Release and choose “Copy.” This places the entire ADIF-compliant log into memory to paste into QuickText.
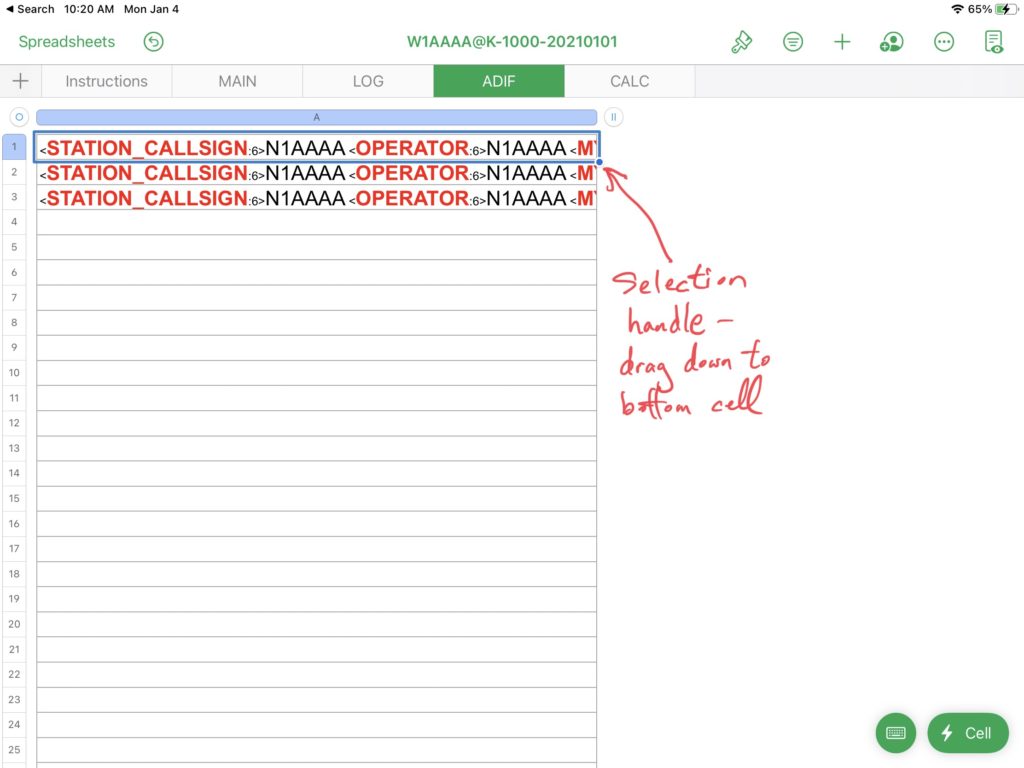
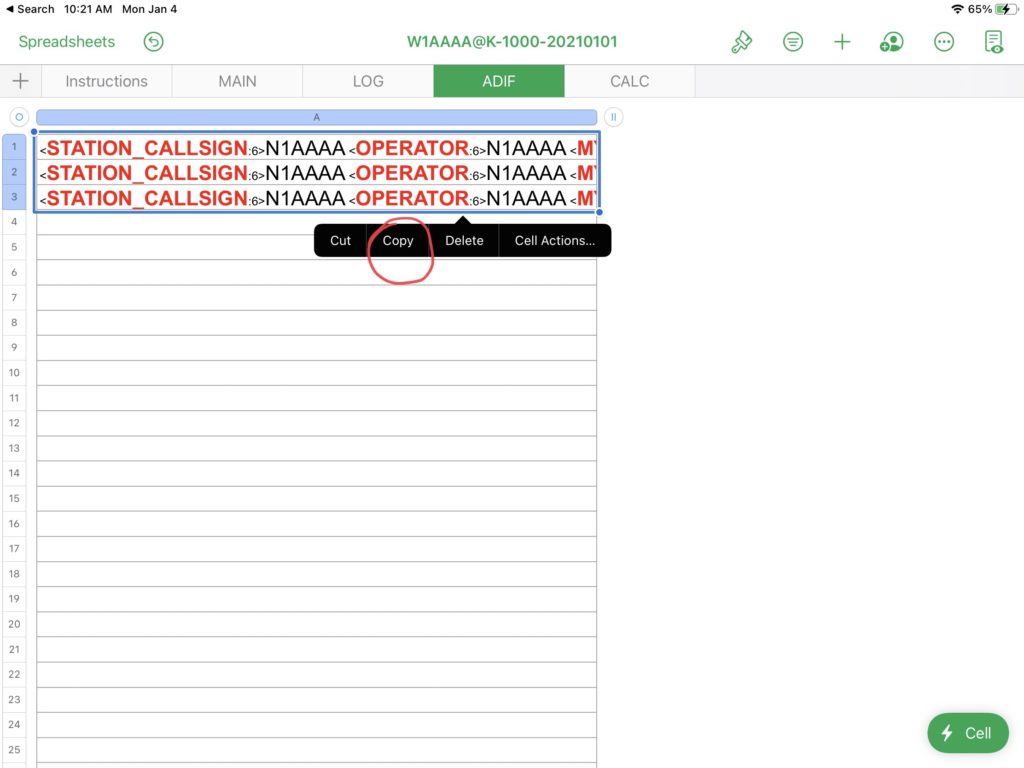
Warning: Be very careful not to cut, delete, or move any of the cells in the ADIF tab. You only want to select the cells and copy them. If you inadvertently replace a cell, please hit the undo button to correct your error.
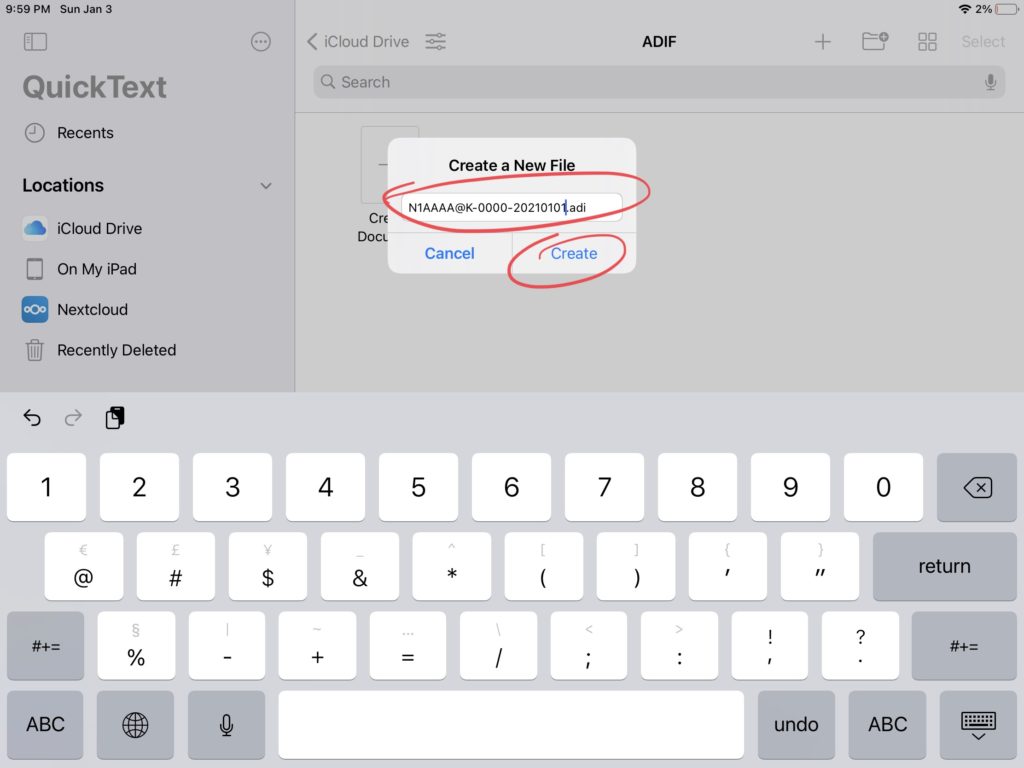
Open the QuickText app and create a new file, named per the POTA requirement (MYCALL@PARK-YYMMDD.adi).
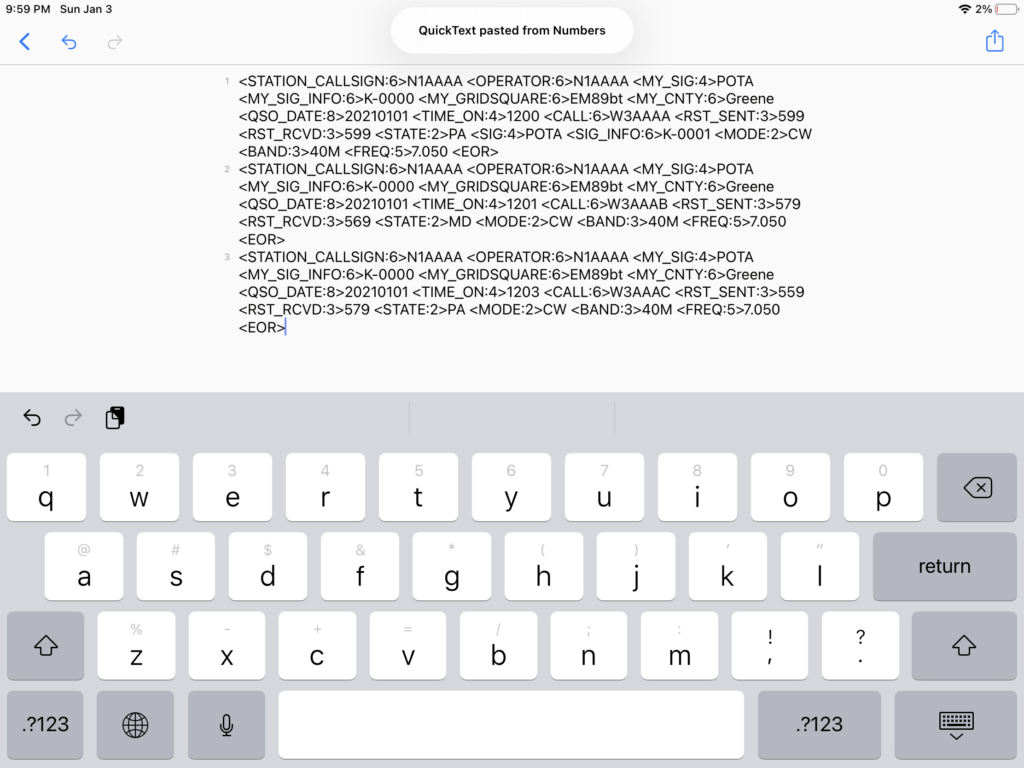
Paste the contents of your log into this file by long-pressing inside the editing window and choosing “Paste.”
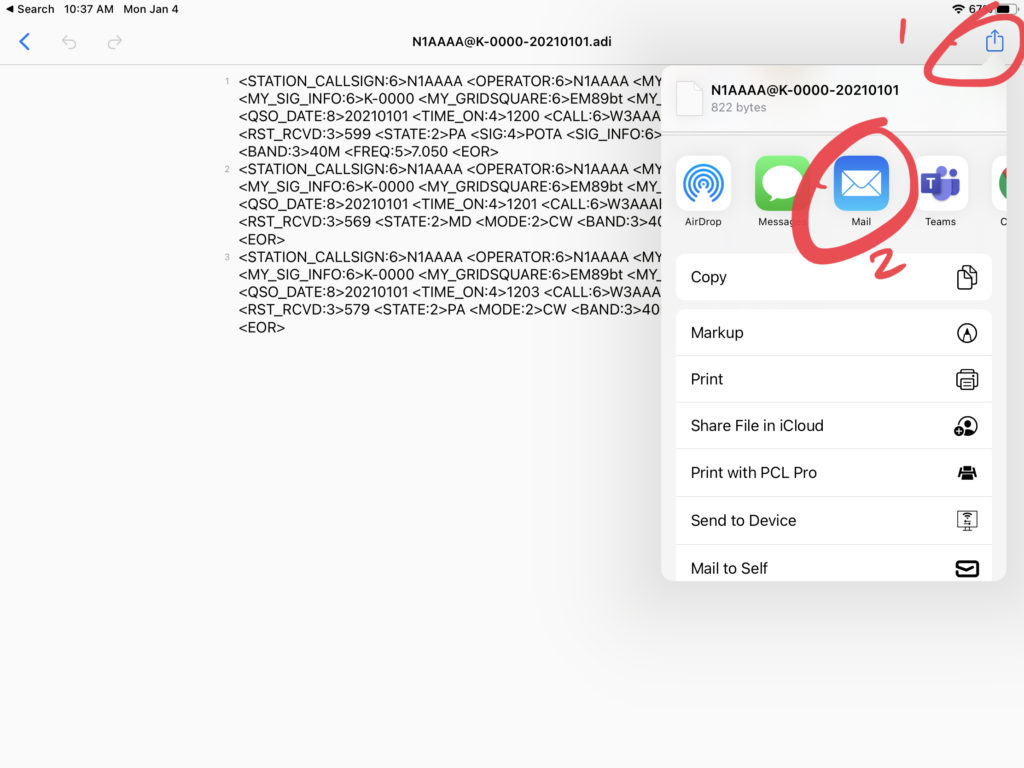
Save the file and email it to yourself and/or to your regional coordinator by pressing the “Export” button and choosing your email client. The file will be included in your email as an attachment.
Checking Your ADIF File
Until you are confident your logs are being formatted correctly, and especially while this tool is still in beta release, I recommend saving the ADIF file to a Windows PC and examining it before sending it to your regional coordinator.
Download and install the free “ADIF Master” utility, open your .adi file with it, and inspect the file to ensure all fields appear as they should.
The ADIF Master utility is fairly robust and could theoretically be used to enter your log directly into an ADIF-compatible file, but it lacks some of the refinements (and intuitive interface) to which many spreadsheet users have become accustomed. Additionally, it is only available on the Microsoft Windows platform.
Retaining Old Logs and Starting a New One
I recommend keeping all of your original Numbers spreadsheets instead of overwriting them, along with your ADIF files for every activation.
You can import the ADIF files into your favorite logging application for long-term reference if you wish, and for exporting into other logging systems such as the ARRL Logbook of the World, QRZ.com, or eQSL.
To start a new activation, always make a fresh copy of the original template you created in the “Configuration” section so you don’t inadvertently change an historical log.
Additional Notes
For users who do not wish to install QuickText, there is an alternative: Instead of pasting the ADIF log into a new QuickText .adi file, paste it into a blank email and send it to yourself for editing on a desktop computer. You may then copy the log entries from your email, paste it into a plain text editor such as the Microsoft Windows Notepad, and save it with an .adi extension.